 Save
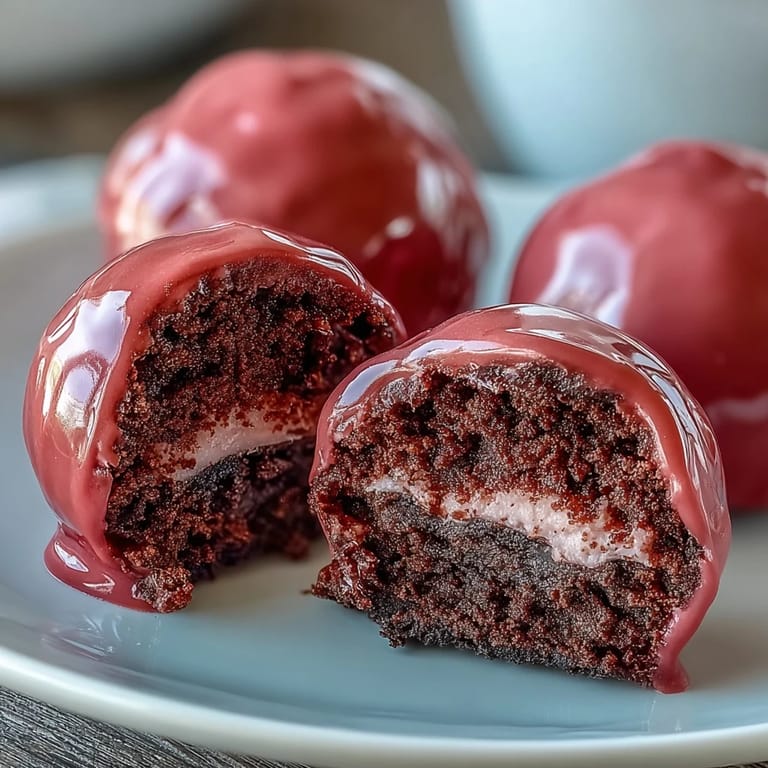
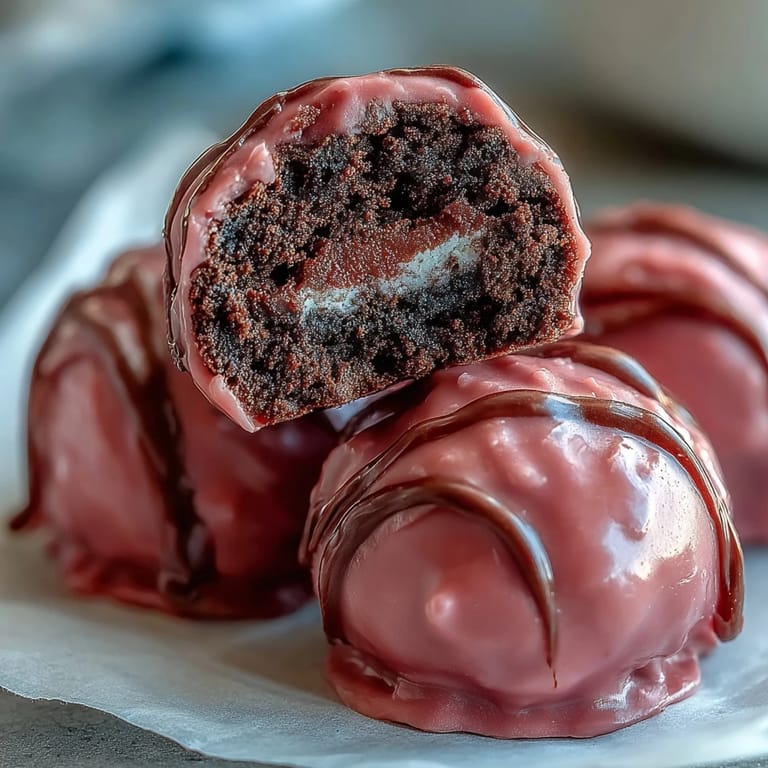
Save My neighbor brought a tin of these to a book club meeting, and I watched every single one vanish in under ten minutes. The pink coating caught everyone's eye first, but it was that first bite—the gentle crack, then the impossibly smooth Oreo cream—that had people reaching back for seconds. I asked for the recipe that night, and she laughed and said it was almost too easy to share. I've been making them ever since, tweaking the colors for birthdays, holidays, and any excuse to fill a plate with something this pretty and indulgent.
I made my first batch for my daughter's spring recital, and the pink coating matched her tutu perfectly. She insisted on helping roll the balls, and we ended up with a few lopsided ones that we called our practice batch. Those imperfect truffles tasted just as good, and we ate them together in the kitchen while the perfect ones chilled. Now every time I make these, she asks if we can keep a few ugly ones just for us.
Ingredients
- Oreo cookies: Use the whole cookie, filling and all, for that signature flavor and dark speckled look inside each truffle.
- Cream cheese: Room temperature is key so it blends smoothly without lumps, creating that creamy, fudgy texture that holds the crumbs together.
- Pink candy melts: These melt evenly and set with a beautiful sheen, and you can swap colors to match any theme or season.
- Vegetable shortening: A tiny bit thins the melted candy just enough to make dipping easier and the coating silkier.
- Sprinkles or edible pearls: A finishing touch that adds texture and sparkle, turning simple truffles into something bakery-worthy.
Tired of Takeout? 🥡
Get 10 meals you can make faster than delivery arrives. Seriously.
One email. No spam. Unsubscribe anytime.
Instructions
- Crush the cookies:
- Pulse the Oreos in a food processor until they look like dark, fragrant sand, or seal them in a bag and let out some stress with a rolling pin. Either way, aim for fine crumbs with no big chunks left behind.
- Mix the base:
- Stir the softened cream cheese into the crumbs with a sturdy spatula, working it until the mixture turns uniformly dark and feels like cookie dough. Your arm might get a little tired, but it's worth it for that silky texture.
- Shape the truffles:
- Scoop tablespoon-sized portions and roll them between your palms into smooth, firm balls. Line them up on a parchment-covered baking sheet as you go.
- Chill until firm:
- Pop the tray in the fridge for 30 minutes or the freezer for 15, just until the truffles feel solid enough to dip without falling apart. Cold truffles coat much more cleanly.
- Melt the candy coating:
- Heat the candy melts in a microwave-safe bowl in short 30-second bursts, stirring between each one until the mixture is glossy and smooth. Stir in a teaspoon of shortening if you want an even more fluid coating.
- Dip and coat:
- Drop a chilled truffle onto a fork, roll it gently in the melted candy, then tap the fork on the bowl's edge to let excess coating drip off. Slide it back onto the parchment with a little wiggle.
- Decorate while wet:
- Sprinkle on your decorations right away, before the coating sets. A light hand keeps them from sliding off once everything hardens.
- Let them set:
- Leave the truffles at room temperature until the coating feels firm to the touch, or speed things up with a quick 10-minute chill in the fridge. Once set, they're ready to serve or store.
 Save
Save I brought a platter of these to a potluck once, and a friend's little boy asked if they were magic because they looked too pretty to be homemade. His mom winked at me and said I should let him believe it. I didn't correct him, and honestly, watching his face light up when he bit into one felt a little like magic anyway.
Choosing Your Coating Color
Pink is festive and sweet, but I've made these in mint green for spring, deep red for Valentine's Day, and even black and orange for Halloween. Candy melts come in nearly every shade, or you can tint white melts with oil-based food coloring to get exactly the hue you want. Just remember that water-based coloring will seize the candy, so stick with the oil kind or buy pre-colored melts to save yourself the trouble.
Storing and Serving
These truffles taste best when served cold, straight from the fridge, because the coating stays crisp and the inside feels extra creamy. I keep mine in an airtight container layered between sheets of parchment paper so they don't stick together. They'll stay fresh for up to a week, though in my house they rarely last more than three days.
Make Them Your Own
Once you've nailed the basic recipe, it's easy to play around. I've stirred mini chocolate chips into the truffle mixture for extra texture, rolled a few in crushed graham crackers before dipping, and even drizzled contrasting candy melt colors over the set coating for a fancier look.
- Try golden Oreos and yellow candy melts for a sunshine version that's perfect for summer parties.
- Add a pinch of espresso powder to the cream cheese mixture for a subtle mocha twist.
- Top each truffle with a tiny piece of candied ginger or a salted caramel chip before the coating sets.
 Save
Save There's something deeply satisfying about handing someone a homemade treat that looks this polished and tastes this indulgent. These little pink truffles have become my go-to gift, my party MVP, and my secret weapon when I need to impress without spending all day in the kitchen.
Questions & Answers
- → How long should I chill the truffle centers before dipping?
Refrigerate the rolled truffle centers for 30 minutes or freeze for 15 minutes until firm to the touch. Proper chilling prevents the centers from falling apart during the dipping process.
- → Can I use white chocolate instead of candy melts?
White chocolate can work, but candy melts are specifically formulated for coating and set harder without tempering. If using white chocolate, add 1 teaspoon of vegetable shortening to help it set properly.
- → What's the best way to crush the Oreos?
A food processor creates the finest, most uniform crumbs in seconds. Alternatively, place cookies in a sealed zip-top bag and crush with a rolling pin until fine, though this method takes slightly more effort.
- → How should I store the finished truffles?
Keep in an airtight container in the refrigerator for up to one week. The cool temperature maintains the firm texture and prevents the pink coating from softening or becoming sticky.
- → Can I make these ahead of time for an event?
Yes, prepare these up to 3 days in advance. Store layered between parchment paper in the refrigerator. The coating stays vibrant and the centers remain perfectly creamy when chilled.
- → Why add vegetable shortening to the candy coating?
Shortening thins the melted candy slightly, creating a smoother consistency for dipping and producing a shinier finish. It also helps prevent the coating from cracking when it sets.