 Save
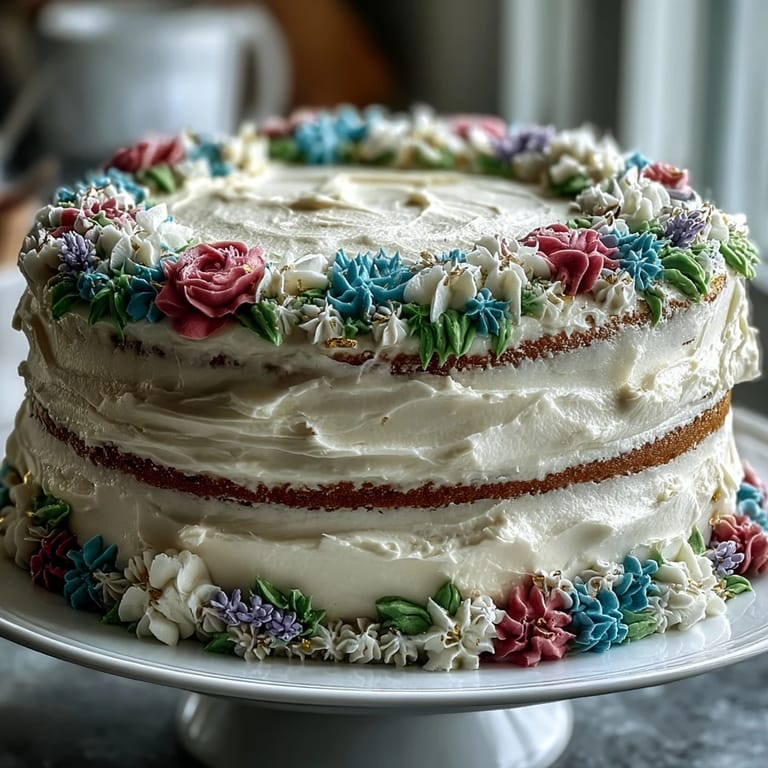
Save My friend Maya called me in a panic two weeks before her graduation, mentioning her Taurus birthday fell on the same weekend. She needed something that felt celebratory but also deeply personal, something that would capture both milestones in one cake. I remembered making vanilla layer cakes for years, always reliable and elegant, but this time I wanted to elevate it with hand-piped florals and soft, intentional colors that felt like they were telling her story.
The night before serving, I found myself piping flowers at midnight while listening to Maya tell stories about her college memories over video call. Her laughter while I shaped tiny roses and peonies made the whole process feel less like a task and more like a shared celebration, even though we were rooms apart. By the time I finished the final leaf detail, I understood why people spend hours on cakes for people they love.
Ingredients
- All-purpose flour: Use quality flour here because it's the backbone of your cake's structure and texture; sifting it once isn't necessary but does help incorporate air.
- Unsalted butter: Room temperature is non-negotiable because cold butter won't cream properly with the sugar, and your batter will be dense.
- Granulated sugar: This sweetness gets balanced by the subtle vanilla, so don't skimp on quality vanilla extract.
- Eggs: Room temperature eggs blend seamlessly into the batter without shocking the mixture and creating lumps.
- Whole milk: The moisture in milk keeps this cake tender and prevents that dry, crumbly texture that disappoints.
- Powdered sugar for frosting: Sift it before measuring to avoid lumps that will ruin your smooth buttercream finish.
- Gel food coloring: Gel holds its color better than liquid and won't thin your buttercream, which matters when you're piping precise florals.
- Piping tips: A basic petal tip and leaf tip are enough; specialty floral tips help but aren't necessary if you're creative.
Tired of Takeout? 🥡
Get 10 meals you can make faster than delivery arrives. Seriously.
One email. No spam. Unsubscribe anytime.
Instructions
- Prepare Your Pans with Care:
- Grease three 8-inch round pans and line them with parchment, then grease the parchment too so nothing sticks. This small step prevents the frustration of cake pieces left behind in the pan.
- Mix Your Dry Ingredients:
- Whisk flour, baking powder, and salt together in a separate bowl; this ensures the leavening distributes evenly throughout the cake instead of creating random pockets of uneven rise.
- Cream Butter and Sugar Until It's Almost Fluffy:
- Beat for 3 to 4 minutes until the mixture looks pale and doubled in volume, which means you've incorporated enough air for a tender crumb. You'll hear the mixer sound change as it lightens.
- Add Eggs One at a Time Without Rushing:
- Let each egg fully incorporate before adding the next; this prevents the batter from looking broken or curdled. If you add them too fast, you'll see little separated flecks floating around.
- Alternate Flour and Milk Gently:
- Start with flour, then milk, then flour again, ending with flour, and mix just until combined after each addition. Overmixing at this stage develops gluten and toughens your cake, so resist the urge to keep going.
- Divide Batter and Bake with Attention:
- Distribute batter evenly among pans by eyeballing or weighing; uneven layers mean one might bake faster than the others. Start checking at 28 minutes because oven temperatures vary, and a toothpick coming out clean is your signal to stop.
- Cool Cakes Before Moving Them:
- Leave them in the pans for 10 minutes so they set enough to handle, then turn them out onto wire racks to cool completely. Rushing this step results in warm, fragile cakes that crumble when you stack them.
- Make Your Buttercream Smooth and Spreadable:
- Beat softened butter until creamy, then add sifted powdered sugar gradually, mixing constantly to avoid lumps that you can't smooth out later. The cream added at the end makes it pliable for both spreading and piping.
- Tint Your Frosting in Separate Bowls:
- Divide buttercream into bowls and add gel coloring drop by drop, stirring until you reach the shade you want. Gel coloring is concentrated, so it's easy to overshoot and end up with neon pink instead of a soft rose.
- Layer and Crumb Coat First:
- Place your first cake layer on a serving plate, add a thin layer of buttercream, then repeat with the remaining layers. A crumb coat is a thin first layer of frosting that seals in crumbs before the final coat goes on.
- Chill Your Crumb Coat for Twenty Minutes:
- This resting period lets the first frosting layer set so your final coat goes on smoothly without dragging up crumbs and making everything look messy.
- Apply Your Final Smooth Coat of Buttercream:
- Use an offset spatula dipped in warm water for a polished finish, or keep it slightly rustic depending on your style. Either way, this coat becomes your canvas for piped florals.
- Pipe Floral Designs with Confidence:
- Load your piping bag with colored buttercream and practice on parchment first if you're nervous, then pipe directly onto the cake. Start with simple shapes like petals and leaves before attempting complicated blossoms.
- Add Taurus or Graduation Symbols Thoughtfully:
- Edible gold leaf adds elegance if you're celebrating the Taurus birthday, while a small piped graduation cap works for the other milestone. These touches make the cake tell both stories at once.
- Chill Before Serving for Clean Slices:
- A cold cake holds its shape better when you cut into it, so chill for at least an hour before serving. Bring it back to room temperature for about 20 minutes before slicing so the frosting tastes creamy instead of firm.
 Save
Save When Maya saw the finished cake, she actually teared up because she recognized tiny details I'd added, like incorporating her favorite flower and the earth tones that matched her school colors. That moment reminded me that cakes aren't just dessert; they're edible memory keepers that tell people we see them and celebrate who they are.
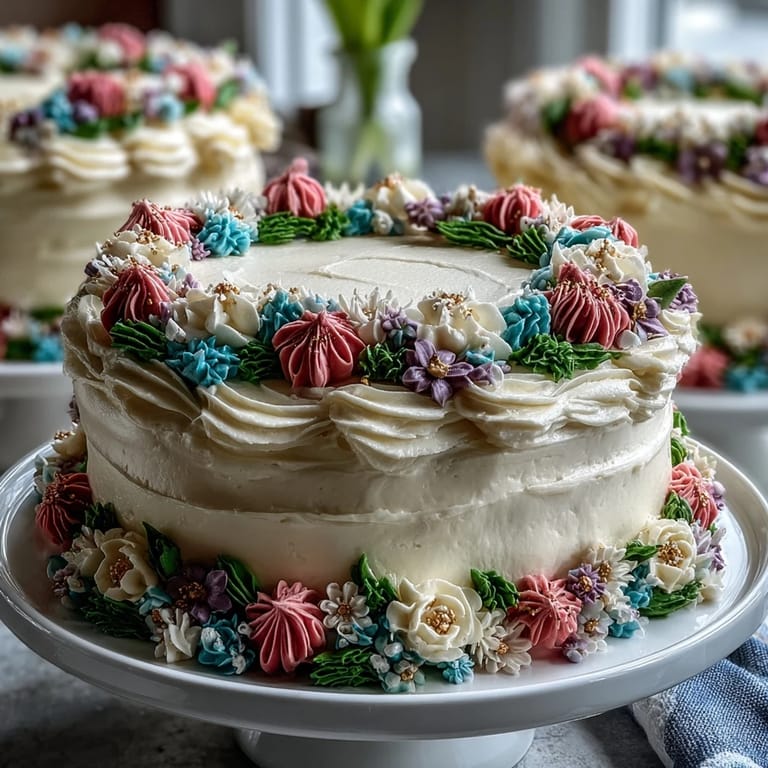
Personalizing Your Floral Design
The beauty of this cake is that you can shift the entire aesthetic by changing your color palette and flower choices. I've done versions with spring pastels, jewel tones, and even a moody deep purple and gold combination that looked like something from a fantasy novel. The vanilla cake is neutral enough to support whatever mood you want to create, whether that's cheerful and bright or elegant and sophisticated.
Timing and Make-Ahead Strategy
You can bake the cake layers up to two days ahead and wrap them tightly at room temperature, which takes pressure off the day of decorating. The buttercream also keeps in the fridge for three days, so you can make it the night before and just let it soften at room temperature before piping. This flexibility is what makes a celebration cake feel manageable instead of overwhelming.
Flavor Variations and Serving Ideas
The vanilla base is intentionally neutral so it pairs beautifully with whatever flavor profile you want to build around it. Some people add a touch of almond extract to the cake batter for subtle depth, while others prefer to keep it pure vanilla and let any fruit or tea pairing do the talking. I've served this cake with sparkling wine, iced floral tea, and even fresh berries pressed into the frosting for a more garden-forward feel.
- Add a thin layer of fruit jam between cake layers if you want subtle tartness that cuts through the sweetness.
- Serve alongside a complementary beverage like rose tea or champagne to elevate the celebration moment.
- Leftover cake keeps well wrapped at room temperature for a day or two, tasting even better as the flavors meld.
 Save
Save This cake celebrates both achievement and personal history, which makes it feel more meaningful than just another dessert on the table. Every time you layer it and frost it, you're creating something that will be remembered alongside the actual milestone.
Questions & Answers
- → How do I achieve smooth floral buttercream decorations?
Whip the buttercream until creamy, then gradually add powdered sugar and cream to reach the right consistency. Use various gel food colorings to tint and practice piping techniques with different tips for petal and leaf shapes.
- → What is the best way to ensure moist cake layers?
Alternate adding the dry flour mixture and whole milk to the batter, starting and ending with flour, and mix until just combined. This method keeps the layers tender and evenly moist.
- → Can I prepare decorations in advance?
Yes, floral buttercream decorations can be piped onto parchment, chilled, and transferred onto the cake later for more intricate designs.
- → How do I add a personal touch to the cake decorations?
Customize the floral colors to match the recipient’s birth month flowers or school colors, and accent with edible gold leaf or gold sprinkles for special symbolism.
- → What tools are recommended for decorating this cake?
Use piping bags with assorted floral tips such as petal, leaf, and round tips. An offset spatula helps smooth the frosting, and a cake turntable can aid in even decorating.